Category Archives: Herb Garden

Chokecherry Jelly

My Chokecherry Jelly

Even though I picked the chokecherries in late July, I just got around to making the jelly this past weekend. The nice thing about making jelly, as opposed to jam or preserves, is that you just need the juice & the juice is easier to store than fruit. Within a few days of picking the chokecherries, I make the juice with the intention of freezing it & making jelly later. In my other post Chokecherry Madness, I posted a link to food.com’s search of chokecherry recipes.

Chokecherry Harvest

I picked about 4 pounds of cherries all together. When I decided to seriously get into canning this summer, I bought a bunch of supplies so I could be prepared. One of the things I bought was a digital scale. It was relatively cheap, under $20, but it was a great investment. Most of the recipes I’ve found, especially in the Ball Blue Book (which I absolutely love & reference constantly) call for ingredients by weight. So having a scale has turned out to be a lot more important that I expected. Another thing I like about the digital scale I have is that you can tare it to include a container or plate. I’ll put the colander or bowl on the scale, tare it, then start loading it up. It’s very easy. I’ve learned canning includes insane amounts of calculations, number of jars needed, figuring time to correct altitude, pounds of food per jar, dividing pints to half pints or quarts to pints, etc. Anything that cuts out more math makes it easier for me & most importantly takes out the possibility of a mental math error. Anyways . .  back from my “make sure you buy a scale speech” I ended up with about 4 pounds of fruit. I split it in half to process in the juice in 2 batches. I don’t think it really matters exactly how much water you put in with the fruit, I read to make sure it’s “fully submerged.” I boiled the juice for a good hour. It had a really interesting smell. As it cooked I got some ideas to flavor it. I thought it smelled a little citrusy so I added some lemon thyme to the pot. I love lemon thyme, I love regular thyme, so I put some of that in there too. I pulled it off when the liquid was reduced to about half of what it was. The remaining liquid was a crazy bright pink, purple, red color. It was cloudy too, not clear like store bought juice. I strained everything through cheesecloth, letting it sit over the pot & drain for a good half hour. Once it stopped dripping, I kind of smashed it down to mash the fruit & to squeeze any remaining liquid out of the mush. I got 2 cups of juice for the first batch & 3 for the second, so all together a little over 5 cups. I split the liquid into these Ball plastic freezer containers (I LOVE these things, anything liquid I freeze I put in these containers, they are wonderful & stuff keeps so much better in them instead of glass jars or other plastic ones) & stuck them in the freezer. Another thing I like about those plastic containers is that they stack, the lids have a that the bottoms click into so they don’t slip off each other or fall over. I kept the juice frozen for a little over a month. I defrosted the juice in a stock pot. I bought a jar of Ball regular pectin. Since chokecherry jelly isn’t in the Ball Blue Book I didn’t know what proportions to use. The label of the pectin directed me to their website where they have a Pectin Calculator. It’s a great tool to use, you select the fruit, select jam or jelly, select the type of pectin you have & it gives you the amounts of juice/fruit, sugar & pectin to use depending on how many jars you need or how much fruit you have. It’s a great site, I will definitely reference it in the future! I had some pretty thick juice once it melted so I added a little extra water to it. The first batch I made was for 6 pint-sized jelly jars. I used 4 1/2 cups of juice. I had a little under 3 cups of juice left so I added enough water to make 4 more jars with 3 1/3 cups of the remaining juice. All together I ended up with 10 jars of processed chokecherry jelly with a little bit leftover that I stuck in a jar to eat right away. It tastes delicious!

Canned Chokecherry Jelly

I definitely like the added lemon thyme. I didn’t want to add too much flavor because I’ve never had chokecherry jelly before & wanted to know what it tasted like before adding spices. I really like it & I love the fact that there are so many chokecherry plants here in Denver I can pick as much as I want! Next summer I will be making more jelly but I’d like to try some new flavors as well. I’d like to try a more lemony version, maybe using lemon verbena, lemon basil, lemon thyme & regular thyme. I’d also like to try a version that would taste like my favorite roasted cranberry sauce (I make it every year at Thanksgiving). For that one I’d add lemon juice, use brown sugar instead of white, use rosemary, sage & thyme. I may or may not roast the fruit before, the cranberry sauce recipe calls for roasting the cranberries & creating a lumpy mess instead of smashing them or using a food mill. It also uses red wine to create the sauce & I wonder if I could add some wine or wine vinegar to the jelly. I’ll have to think about that one!

Chokecherry Jelly on Toast & Tea

Tea of the Day: June 27, 2012

OK, so technically I didn’t make this tea TODAY, but it is the tea of the day. It is in honor of the insane week of 100+ degree weather we’ve been having. I love sun tea. My mom used to make it when I was little. She used black tea, sweetened with mint. It was very good. As I got older I was surprised to learn that not everybody in the universe knows what mint tea is?! If you’ve never had it before, you are missing out! If you have, then you know how delicious it is. Either way, here is a new way to enjoy it from your very own happy spot in the sun. The tea of today is Super Sun Tea!

Apple Mint Tea: Enjoying a Quiet Moment

Super Sun Tea: Brewing

I was inspired to make this recipe with the herbs I picked up a few weeks ago. I’ve blogged about them already with my Pineapple Mint Tea & Apple Mint Tea posts. They are all delicious but put together, they are incredible. Most sun tea is made with black tea but a few summers ago I ran out of tea bags & really REALLY wanted some sun tea so I tried the green tea bags I had languishing in my cupboard. Green tea is so light & refreshing, plus it allows other flavors to come out instead of overpowering them. Take a look in the drink section at any gas station & you’ll see a ton of commercial ice teas made with green tea.

Super Sun Tea

Super Sun Tea: Herbs

Ingredients

  • 5 large sprigs fresh apple mint ~3-4″ long
  • 5 large sprigs fresh pineappleapple mint ~3-4″ long
  • 3 sprigs fresh lemon balm ~2-3″ long
  • 2 bags green tea (I prefer Celestial Seasonings brand)
  • Raw sugar to taste
  • Cloth spice bag
  • Sun tea jar (any clean glass container will work, with lid a plus, I also use a leftover 1 gallon juice growler)
Directions
  • Place tea bags in container.
  • Put herbs in a spice bag & place in container.
  • Pour sugar into container. (I use 1/4 cup sugar per 2 quarts for sweet tea)
  • Fill up container with lukewarm water. *see Note on water
  • Stir with a long spoon or shake container to dissolve sugar.
  • Place jar outside in a sunny spot for at least 2 hours, no longer than 8 hours.
  • Bring in tea when brewed to perfection &

*Note on water: I usually don’t have an over abundance of ice cubes. Unfortunately I don’t have an ice maker, just a couple silicone trays from Ikea. If you want to speed up the cooling process, fill up the jar only 2/3 full. Then, when the tea is done, fill up the remaining space with cold water. The idea of iced tea is that the tea is strong & then diluted by the melting ice. So it’s ok to forgo the melting process & just add cold water.

Tea of the Day: June 19, 2012

So today I moved on down the herb list to Apple Mint! This morning I made some Apple Mint Tea.

Apple Mint Tea: Enjoying a Quiet Moment

Apple Mint Tea: Enjoying a Quiet Moment

I try to get up a little bit early now days so I can enjoy some quiet, alone time. I decided to work on my knitting for a moment, while enjoying my tea. 🙂

Apple Mint Tea

Apple Mint Tea

Apple Mint Tea

Ingredients

  • 7 sprigs crushed fresh apple mint
  • Honey
  • Cloth spice bag
Directions
  • Put mint in a spice bag. Place in cup.
  • Cover with boiling water.
  • Sweeten with honey to taste.

Tea of the Day: June 18, 2012

I got some new herbs from Sunflower Market. They were on sale but more importantly they had stuff I’ve never seen! Apple mint? I had to get some. I ended buying a pineapple mint, apple mint, a cilantro plant, silver thyme & a couple bunches of green onions. My sister gave me an AWESOME mothers day gift, a tea garden. It was so cute! It was a container with lavender, mint, pineapple mint & a tea ball. Such a perfect gift. Anyways I’ve never tried pineapple mint before that. The plants didn’t do very well so when I saw another plant I was exited. I made some sun tea (I’ll post that tomorrow) & I wanted to really get a taste of each plant’s flavor. So today I tried the pineapple mint which resulted in Pineapple Mint Tea.

Pineapple Mint Tea

Pineapple Mint Tea

Pineapple Mint Tea

Ingredients

  • 7 sprigs crushed fresh pineapple mint
  • Honey
  • Cloth spice bag
Directions
  • Put mint in a spice bag. Place in cup.
  • Cover with boiling water.
  • Sweeten with honey to taste.

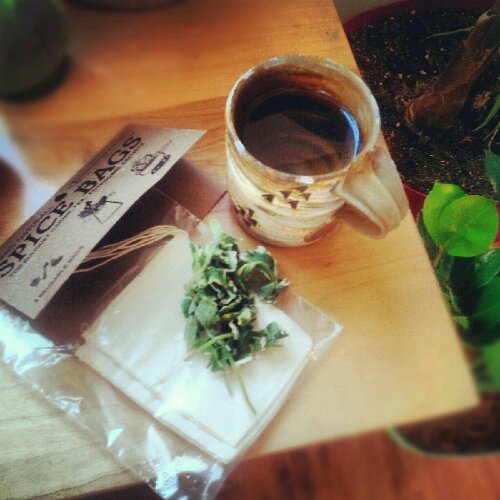
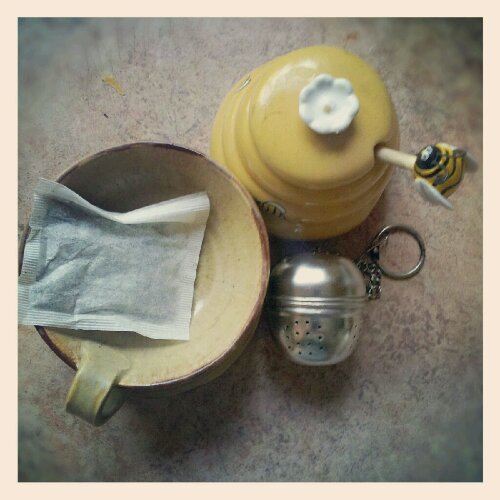
*A note on using fresh herbs & loose teas: there are a couple options for steeping fresh herbs & loose tea. You can use a tea ball, a tea grabber (? If there’s a real name for this contraption please let me know, it has a mesh ball that is squeezed open with attached tong type things) or tea bags, also called spice bags. Personally I prefer the bags. The tea balls can be hard to clean & sometimes leave a funky metal taste if old or dirty. Plus the holes can leak smaller pieces & that’s not appealing to have black things floating in your cup.

Spice Bags

Spice Bags

These are the bags I like to get & they’re very cheap.

Tea of the Day: June 14, 2012

Today’s tea was an experiment to try something new. I call it Herb Garden Tea.

Herb Garden Tea Ingredients

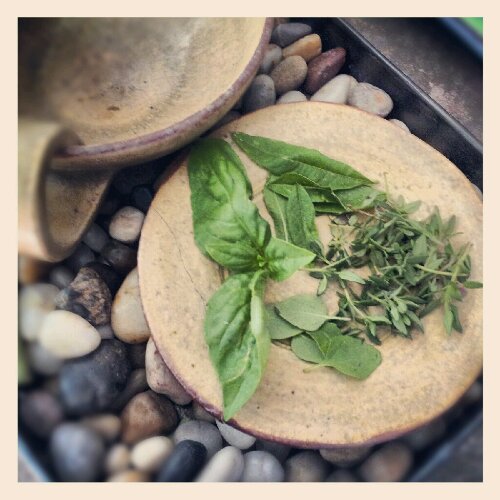
Herb Garden Tea: Herbs

I chose the herbs while watering my spice garden this morning. The herbs I used are shown in the picture clockwise from the top – lemon verbena, thyme, Greek oregano, fresh sweet basil. I used honey, again to try something different because I usually use raw cane sugar with my herbal teas. It was very good. It tasted very green, not spicy. It almost reminded me of sweet clover, like the smell at the park right in the evening the day they’ve cut the grass. Actually most of my tea inspirations happen when I’m watering my spices. They smell different when they’re still growing on the plant & they’re being watered. It’s like the leaves open up & let off the true taste, completely & utterly different from anything you’ll ever taste dried in a jar at the store. That’s like comparing a dried rose you’ve found in you’re grandma’s attic to a fresh on growing in the yard, completely different!

I combined everything in my large travel mug & let for step for a good 5 minutes before tasting. I leave the tea ball in till i’m fine because you can’t over steep fresh herbs. It was good & yes, different!

Herb Garden Tea

Herb Garden Tea

Herb Garden Tea

Ingredients

  • 1 Green Tea teabag (by Celestial Seasonings)
  • 5 leaves fresh lemon verbena
  • 12 sprigs fresh thyme (pinch off the tips)
  • 5 leaves fresh greek oregano
  • 1 sprig fresh sweet basil (bunch of ~ 5-7 leaves)
  • Amber wildflower honey
  • Cloth tea bag

Instructions

  1. Boil a kettle of water until whistling or to a rolling boil.
  2. Place ingredients in the receptacle of your choosing. (I combined the herbs in a tea ball. I crush the fresh leaves between my fingers to release their scent.)
  3. Add a bag of Celestial Seasonings Green + White Tea (the best tea for creating your own flavor, it provides a light tea base without overpowering the lighter flavors like black tea does)
  4. Pour boiling water over ingredients.
  5. Stir in honey, sweeten to taste
  6. Allow to steep for at least 5 minutes. Remove tea bag after no more than 10 minutes. The herbs stay in the tea as it is drank.
  7. Enjoy!